Enable NPM in a SharePoint Hosted App
In this post, I’ll give step-by-step instructions of using Node Package Manager (NPM) in Visual Studio. This will require your environment to be configured for TypeScript. Refer to my previous post of Enabling TypeScript in a SharePoint Hosted App (Add-In).
Add Node Package Manager (NPM)
This section will go over the setup and configuration of the Visual Studio project. This will be a continuation of the project created in the previous post.
Install NPM
If you haven’t already installed “NodeJS”, you will be required to. Here is the link for installation file. Download the latest, and install it using the default settings.
Add a Package File
NPM uses a package file to assist with the libraries referenced in the project. Refer to the documentation for additional details of this file.
Add a New Item
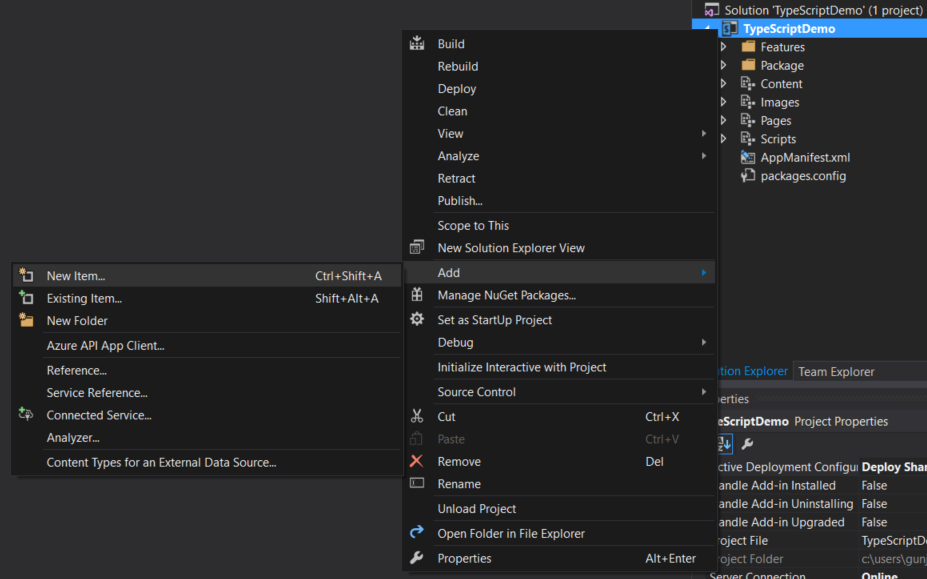
Right click on the project to add a new item to the root of it.
Add the NPM Package File
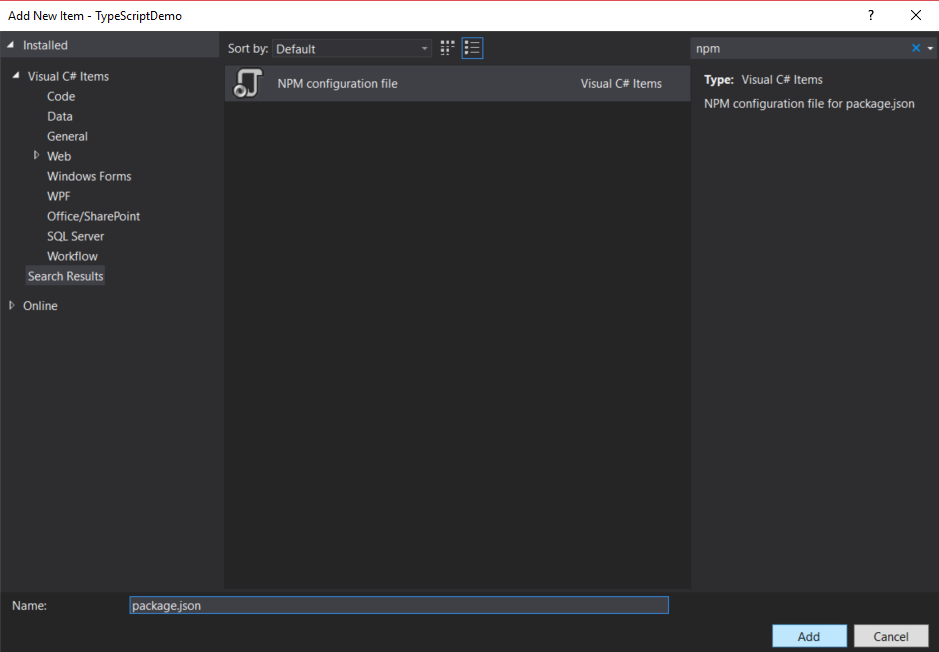
Search for “npm” and you should find the “NPM Configuration File” item type. Rename it to “package.json” and click on “Add” to add it to the project.
Add Dev Dependencies
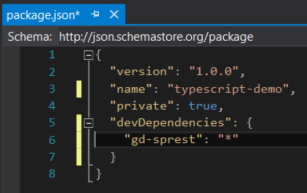
Update the “name” property to match your project name. (Note - This value cannot contain specific characters. Refer to the documentation for additional details.) style=”max-width:100%”
I’ll add my SP REST library as an example. There is intellisense, which is very helpful. Type in “gd-sprest” and set the value to “*” or the specific version. Make sure to save the file before moving to the next step. Saving the file will automatically install the package. These files will be located under the ”[CS Project Directory]\node-modules” directory.
Node Modules Directory
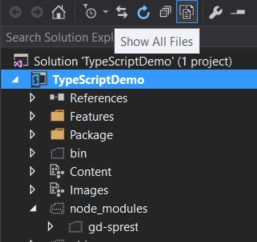
If you click on the “Show All Files” option, you can view the “node_modules” directory and the associated npm packages.
Update Packages
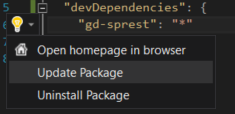
This part is not needed, but more of a reference. If you left-click to the left of the npm packages, a “light-bulb” icon will appear which will provide quick actions.
Add a TypeScript File
This section is just an example of how to get started. I encourage you to read the documentation on the TypeScript configuration file. I’ll just go over a simple example.
Add the App.ts TypeScript File
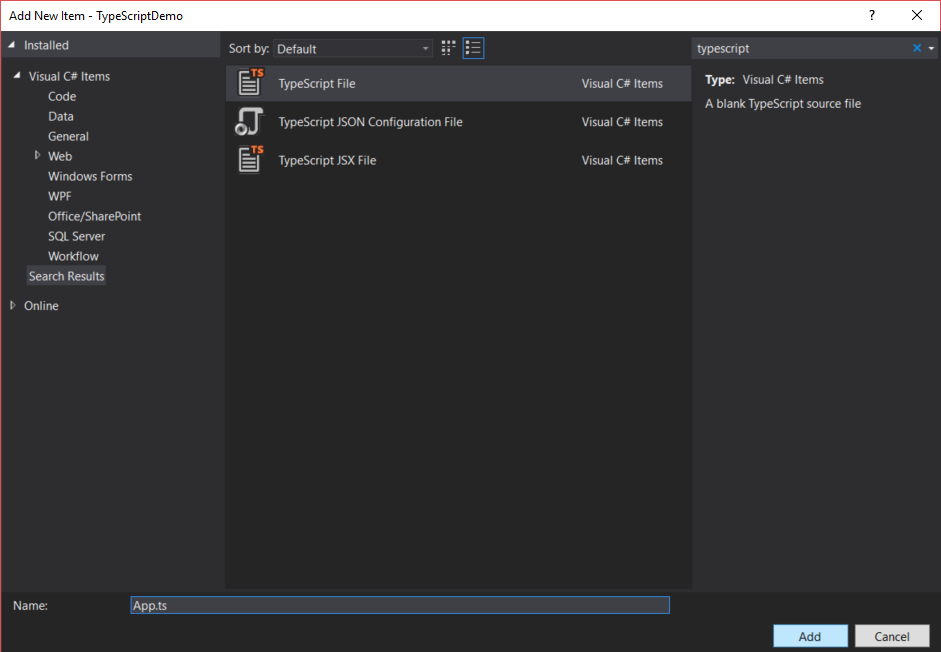
Right-click on the “Scripts” folder and add the “App.ts” typescript file. (Note - This will overwrite the App.js file on save of the associated App.ts file.)
Intellisense

The above is an example of the intellisense available in the gd-sprest library. This feature will make it easier to develop client-side against the SharePoint REST api.
JavaScript Output
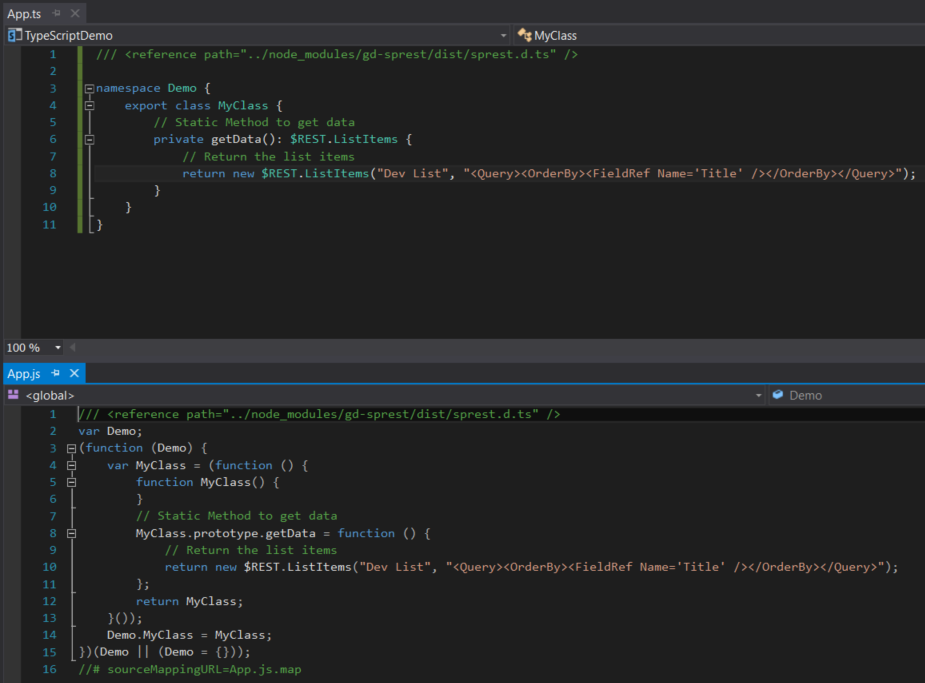
After saving the App.ts file, it will automatically compile and overwrite the App.js file.