Form Generation with Document Sets
This post will discuss form generation in SharePoint 2013+ or Online (Classic) environments. This demo will utilize the document sets feature in SharePoint, which requires the site collection feature to be enabled. If you are using SharePoint Online, then make sure you are viewing the site in “Classic” mode.
Document Sets
The document set feature in SharePoint creates a content type in the root web. When added to a document library, the user will be redirected to a home page with the ability to relate the metadata of a list item to multiple documents. Documents sets do require site content types and columns to be created for form generation, but this example will not require them. My goal is to give a simple example with minimal setup and configuration.
Create the Document Set
1. Create the Document Library
The first thing we will do is create a document library. I’ll go ahead and assume you know how to do this. 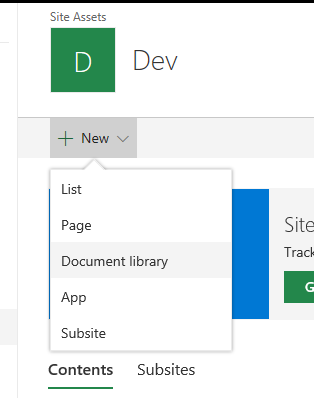
2. Add the Metadata
The second step is to create some metadata fields. I won’t go into details on this, since the metadata created various solution to solution. 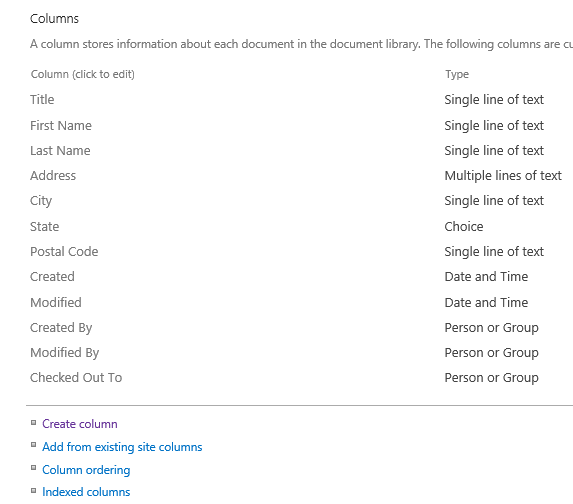
3. Enable Content Type Management
From the library settings page, click on the “Advanced Settings” and enable content type management. 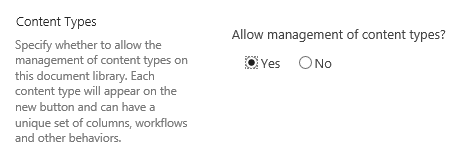
4. Add Document Set Content Type
From the library settings page, click on the “Add from existing site content types” link to add a content type. 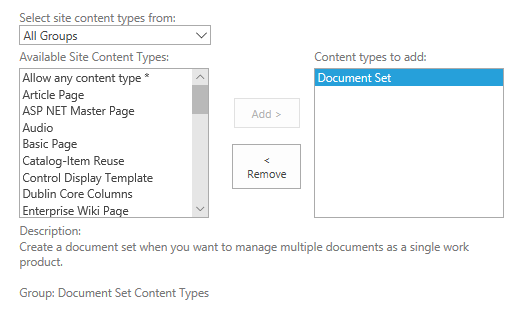 Click on the “Document Set” content type.
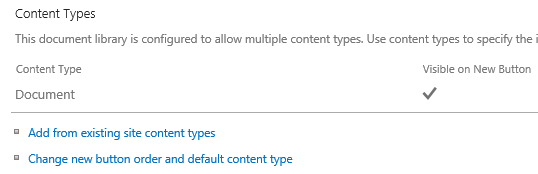
5. Update Content Type Order
By default, the “Document” content type will be available in the “New” ribbon menu button. We’ll only want the user to be able to add a document set, so we’ll need to update the content type order. Click on the “Change new button order and default content type” link to update the order.  Uncheck the “Document” content type.
Configure the Document Set
1. View the Document Set Settings
The metadata we added previously will need to be added to the document set content type. Click on the “Documen Set” link under the “Content Types” section to view the content type settings. 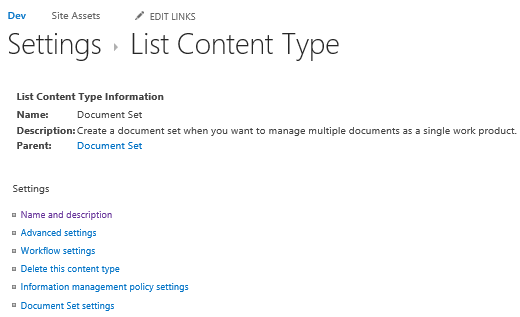
2. Update the Name and Description
Click on the “Name and description” link to update the content type name and description. This information is displayed in the “New” ribbon menu button. 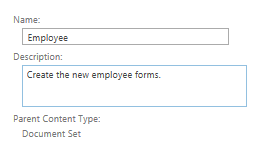
3. Add Metadata
Click on the “Add from existing site or list columns” link, and add the metadata fields. This will allow us to share the metadata across the documents. 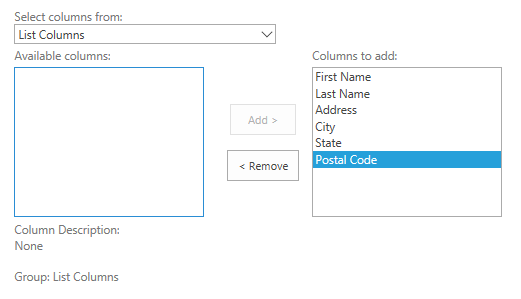
4. Document Set Settings
Click on the “Document Set settings” link to view the document set settings page. Scroll down the page, and update the shared columns and fields to display on the welcome page. 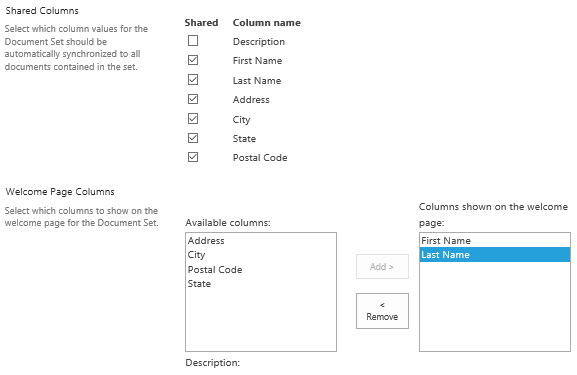
5. Create Document Templates
Before moving on, we’ll have to create the document templates. All you need to do is create blank forms for now. This example will have 2 sample forms: “New Account Creation” and “Benefits Package”
6. Add Document Templates
In the “Document Set Settings” page, access the “Documents” section. Click on the “Browse” button, and add the templates. 
Edit Document Templates
1. Open the Template
Now that the templates have been uploaded, we can now edit the templates. The “Quick Parts” will automatically include the metadata fields, so we can reference them on the form. From Microsoft Word, select the “Browse” option to open a document. The url to the template folder is:
[Site Url]/[Document Name]/Forms/Document Set
Example:
https://dattabase.sharepoint.com/sites/dev/docset demo/forms/document set
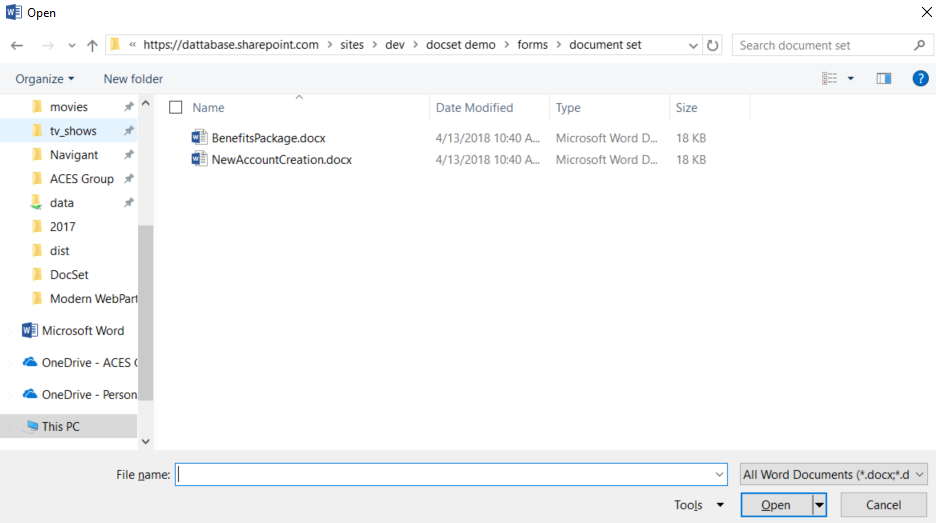 After loading the templates, select a file to open it.
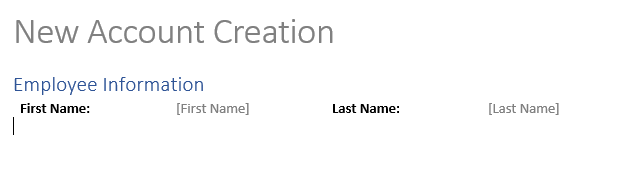
2. Apply Metadata
The metadata properties can be referenced in the document, by selecting the “Insert” ribbon tab and “Quick Parts” menu button. 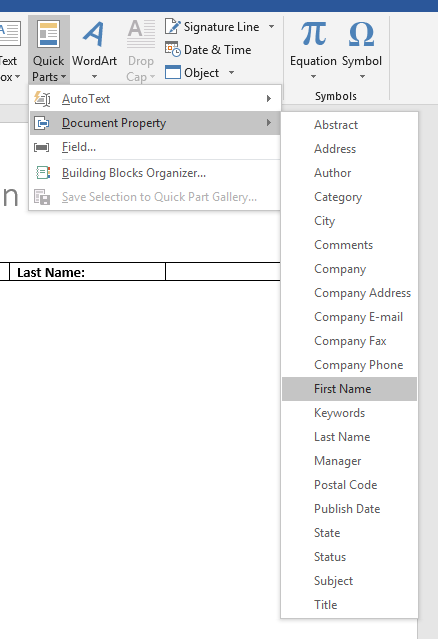
3. Repeat for All Templates
Demo
1. Create the Document Set Item
From the default list view of the document set, select the “Files” ribbon tab, and click on the “New” menu button. Click on the “Employee” item to create a new employee document set. 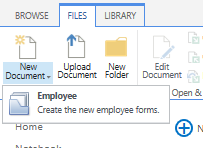
2. Fill out the Metadata
Fill out the new item form and click on “Save”. 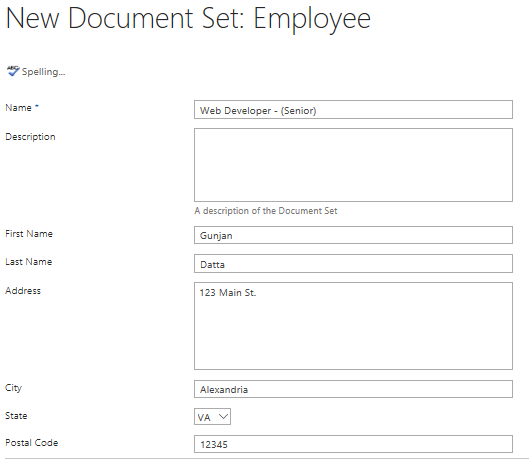
3. Document Set Homepage
After saving the item, you will be redirected to the document set item homepage. 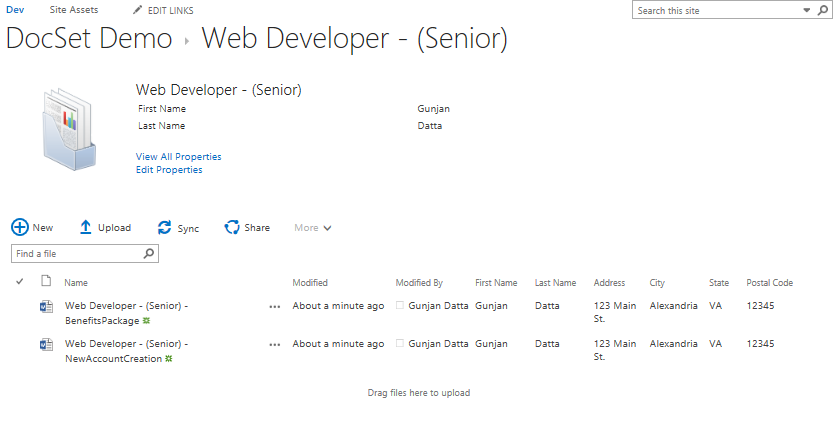
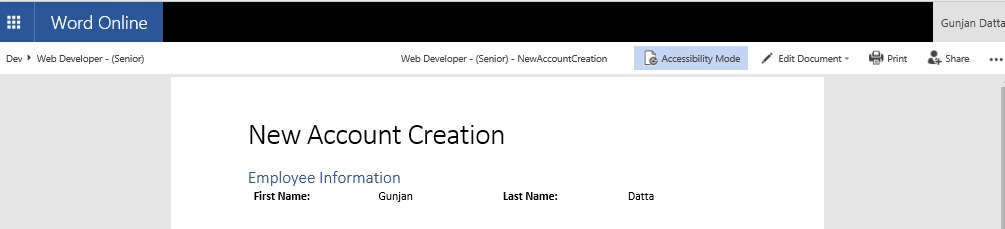
4. View Form
Clicking on a document, the metadata will automatically be applied to the document.