Site Custom Actions SharePoint Hosted App
In this post, I’ll go over a SharePoint Hosted App (Add-In) which adds/removes user custom actions at the site collection level. In Visual Studio, you are able to add custom actions, but they are scoped to the host web, not site collection. This app will also demo the new features of the gd-sprest library available on github and npm.
Project Overview
I wanted to give an example of utilizing the gd-sprest library in a real-world example. The project is a SharePoint Hosted Add-In utilizing the gd-sprest library, and is available on github. The code examples displayed below are written in TypeScript, and has three basic components to the code: init, add and remove. The example custom action we are adding will display a custom banner at the top of every page in the site collection.
Init
// Method to render the panel
static init(elementId?: string) {
        // Set the element id
        this._elementId = elementId ? elementId : this._elementId;

        // Get the site
        (new $REST.Site())
                // Get the custom actions
                .UserCustomActions()
                // Execute the request
                .execute((customActions) => { this.renderPanel(customActions); });
}
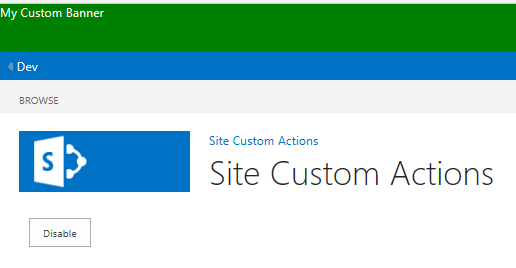
The init method will store the element id to render the button in. The render panel method takes the custom actions and renders a button (“Enable” or “Disable”) based on all of the custom actions existing or not.
Add Custom Action
The add custom action method will add the missing custom actions to the site collection. I’ll break down the code to help explain it.
Get the Custom Actions
// Get the site
let customActions = (new $REST.Site())
        // Get the custom actions
        .UserCustomActions();
The first thing we are doing is getting the custom actions from the site. This will not execute a request to the server, but we will use the user custom action collection object to add our custom ones.
Add CSS Custom Actions
// Parse the css files
for (let caInfo of this._cssFiles) {
        let existsFl = false;

        // Parse the custom actions
        for (let ca of this._caList) {
                // Ensure this custom action exists
                if (ca.Name == caInfo.Name) {
                        // Set the flag
                        existsFl = true;
                        break;
                }
        }

        // See if we need to add this custom action
        if (existsFl) { continue; }

        // Add the custom action
        customActions.add({
                Description: caInfo.Description ? caInfo.Description : "",
                Location: "ScriptLink",
                Name: caInfo.Name,
                Sequence: caInfo.Sequence ? caInfo.Sequence : 100,
                ScriptBlock: "var link=document.createElement('link'); link.rel='stylesheet'; link.type='text/css'; link.href='" + window["_spPageContextInfo"].webAbsoluteUrl + "/" + caInfo.Url + "'; document.head.appendChild(link);"
        }).next();
}
Next, we will parse the css files defined in our global variable and compare them to the current custom actions installed. If the custom action doesn’t exist, then we will add it. The “next()” method will execute the add request to the server.
Add JS Custom Actions
// Parse the js files
for (let caInfo of this._jsFiles) {
        let existsFl = false;

        // Parse the custom actions
        for (let ca of this._caList) {
                // Ensure this custom action exists
                if (ca.Name == caInfo.Name) {
                        // Set the flag
                        existsFl = true;
                        break;
                }
        }

        // See if we need to add this custom action
        if (existsFl) { continue; }

        // Add the custom action
        customActions.add({
                Description: caInfo.Description ? caInfo.Description : "",
                Location: "ScriptLink",
                Name: caInfo.Name,
                Sequence: caInfo.Sequence ? caInfo.Sequence : 100,
                ScriptBlock: "var script=document.createElement('script'); script.src='" + window["_spPageContextInfo"].webAbsoluteUrl + "/" + caInfo.Url + "'; document.head.appendChild(script);"
        }).next();
}
Similar to adding css custom actions, we do the same for the js files. Note that we are using the “next()” method to execute the add request to the server.
Execute the Request
// Execute the request
customActions.execute(() => {
        // Refresh the page
        document.location.reload();
});}
Finally, we execute the request. The execute method will wait until all requests have completed, and returns the responses to the callback method. We don’t need to do anything with the responses, so we will refresh the page to see the custom banner being added to the page.
Remove Custom Action
Below is the code example for removing custom actions. It’s similar to adding, so I won’t break it down.
// Method to remove the custom action
static removeCA() {
        // Get the site
        let customActions = (new $REST.Site())
                // Get the custom actions
                .UserCustomActions();

        // Parse the css files
        for (let caInfo of this._cssFiles) {
                // Parse the custom actions
                for (let ca of this._caList) {
                        // Ensure this custom action exists
                        if (ca.Name == caInfo.Name) {
                                customActions
                                        // Get the custom action
                                        .getById(ca.Id)
                                        // Delete it
                                        .delete()
                                        // Execute the request
                                        .next();

                                // Break from the loop
                                break;
                        }
                }
        }

        // Parse the js files
        for (let caInfo of this._jsFiles) {
                // Parse the custom actions
                for (let ca of this._caList) {
                        // Ensure this custom action exists
                        if (ca.Name == caInfo.Name) {
                                customActions
                                        // Get the custom action
                                        .getById(ca.Id)
                                        // Delete it
                                        .delete()
                                        // Execute the request
                                        .next();

                                // Break from the loop
                                break;
                        }
                }
        }

        // Execute the request
        customActions.execute(() => {
                // Refresh the page
                document.location.reload();
        });
}
Project Link
The project is available on github. I hope the code example of using the gd-sprest library was helpful.