Site Info SPFX Example
This post will go over a SharePoint Framework (SPFX) webpart project using the SharePoint REST Framework. The code can be found on github. Refer to this blog post for a reference for setting up your development environment for SPFX.
SPFX Project Overview
Create the Project
mkdir site-info
cd site-info
yo @microsoft/sharepoint
Wizard Options
- Solution Name: site-info
- Baseline Package: SharePoint Online only
- Target Location: Use the current folder
- Tenant Admin: No
- Project Type: WebPart
- Project Name: Site Info
- Project Description: Demo SPFX example to display the site information.
- Framework: No Framework
Install the SharePoint REST Framework libraries
We will be using the gd-sprest libraries to get data from the REST api.
npm i --save gd-sprest gd-sprest-js
Reference the libraries
// Import the gd-sprest libraries
import { Types } from "gd-sprest";
import { $REST, Fabric } from "gd-sprest-js";
import "gd-sprest-js/build/lib/css/fabric.components.min.css";
Update the Render Method
The /src/webparts/site-info folder contains the webpart code.
// Method to render the webpart
public render(): void {
    // Set the context
    $REST.ContextInfo.setPageContext(this.context.pageContext);

    // Set the html template
    this.domElement.innerHTML = `
        <div class="${ styles.siteInfo}">
            <div class="${ styles.container}">
                <div class="${ styles.row}">
                    <div id="site-info" class="fabric ${ styles.column}">
                    </div>
                </div>
            </div>
        </div>`;

    // Get the site info element
    this.el = this.domElement.querySelector("#site-info") as HTMLDivElement;

    // Load the information
    this.load();
}
Load Method
The load method will render a loading message until the data is loaded. We will expand the web’s content types, fields, lists and sub-webs as part of the request to the server. Once the data is loaded, we will render the web information in tabs.
// Loads the current web information
private load(url?: string) {
    // Render a spinner
    Fabric.Spinner({
        el: this.el,
        text: "Loading the Site Information"
    });

    // Get the web information
    $REST.Web(url).query({
        Expand: ["ContentTypes", "Fields", "Lists", "Webs"]
    }).execute(web => {
        // Render the tabs
        Fabric.Pivot({
            el: this.el,
            tabs: [
                {
                    isSelected: true,
                    name: "Sub Webs",
                    content: this.renderSubWebs(web.Webs.results)
                },
                {
                    name: "Content Types",
                    content: this.renderContentTypes(web.ContentTypes.results)
                },
                {
                    name: "Fields",
                    content: this.renderFields(web.Fields.results)
                },
                {
                    name: "Lists",
                    content: this.renderLists(web.Lists.results)
                },
            ]
        });
    });
}
Render Methods
Reference github for all of the code examples, but below is the render fields method. We will sort the fields by the display name, and use the Fabric “List” component to render the information.
// Renders the fields
private renderFields(fields: Array<Types.SP.IFieldResult>) {
    let items = [];

    // Sort the fields
    fields = fields.sort((a, b) => {
        if (a.Title < b.Title) { return -1; }
        if (a.Title > b.Title) { return 1; }
        return 0;
    });

    // Parse the fields
    for (let i = 0; i < fields.length; i++) {
        let field = fields[i];

        // Add the item
        items.push(Fabric.Templates.ListItem({
            primaryText: field.Title,
            secondaryText: field.Description,
            tertiaryText: field.TypeAsString,
            metaText: field.InternalName
        }));
    }

    // Render a list
    return Fabric.Templates.List({ items });
}
Tenant Workbench
Since we are requiring the site information, we’ll use the tenant workbench to test the solution.
Start Local Server
Run gulp serve --nobrowser to start your local development server to serve the webpart.
Access Workbench
Open your browser and access your tenant workbench by going to https://[tenant].sharepoint.com/_layouts/15/workbench.aspx.
Add the WebPart
Click on the + icon to add the webpart. 
Add Site Info WebPart
Scroll down the webpart list and select the Site Info webpart. 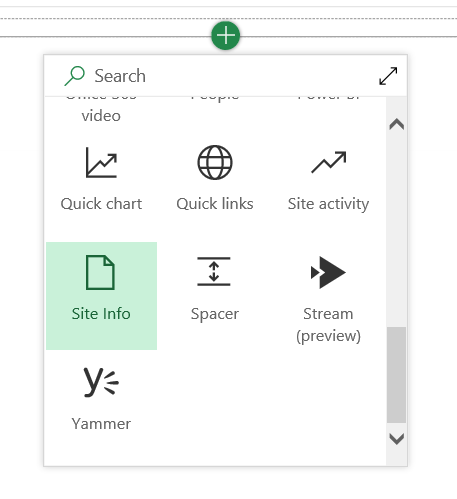
Loading Web Info
Once the webpart is added, a loading message will be displayed until the web information is loaded. 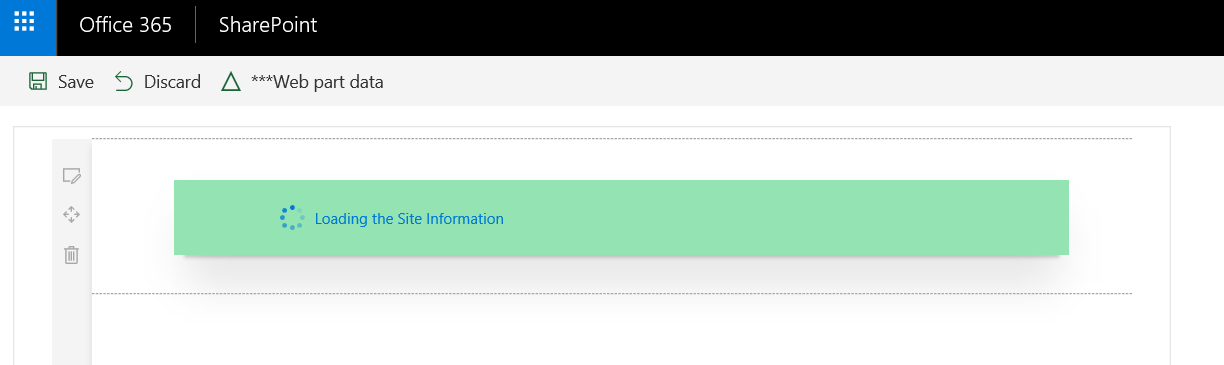
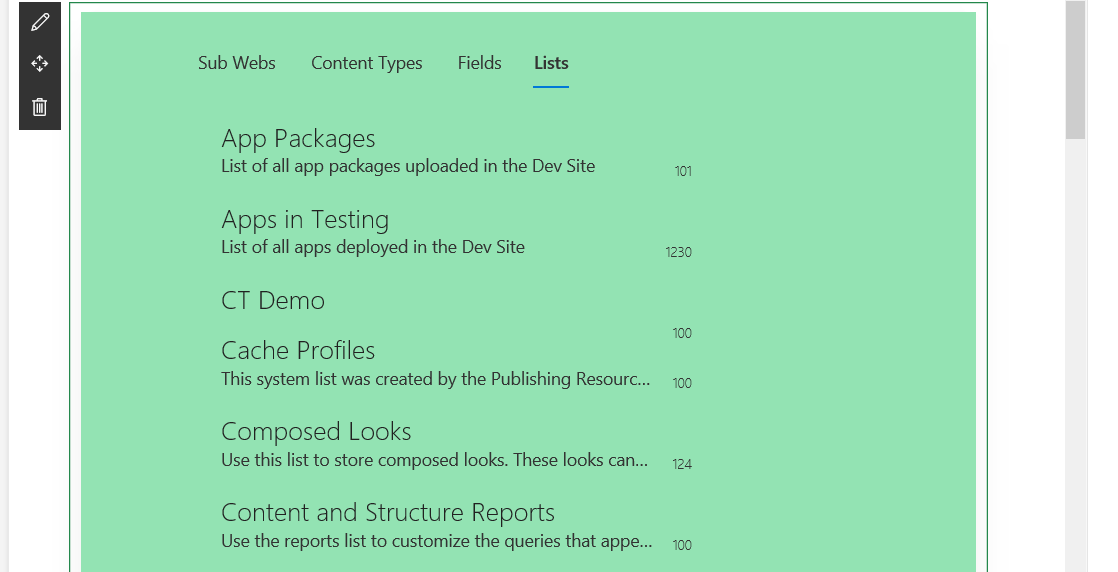
View List Info
The web information will be displayed in tabs.