SharePoint App - Fabric UI and React (Part 3 of 3)
This is the last of three posts giving a step-by-step guide of building a SharePoint Hosted Add-In utilizing the Office Fabric UI React framework. It is broken out into three sections shown below. The previous posts were focused on building solutions for SharePoint 2013 (On-Premise) environments. Now that Office 365 is here, Microsoft has introduced a new way to develop solutions for SharePoint Online using the modern web stack. This is available on-premise, but requires SharePoint 2016 with Feature Pack 2 installed. 1. Configuring the User Interface Project 2. Configuring the SharePoint Hosted Add-In Project 3. Convert to the SharePoint Framework (This Post)
Transitioning to SPFX
The solutions built in SharePoint 2013, should be designed to work in a custom action or webpart. This will make the transition to SPFX significantly easier, given the current options available. Microsoft has provided a step-by-step guide for building your first SPFX project. I recommend following this guide for setting up the project, but please refer to their post for additional details of the steps. If you haven’t setup your environment, please refer to this guide before proceeding.
The previous blog post gave an overview of using the Office Fabric-UI React Framework in a SharePoint Hosted Add-In. We will copy the source code, which is available in github. The benefit of using the modern webstack in SharePoint 2013 solutions, is that we can essentially copy and paste it into a SPFX solution.
Create the Project
Creating a project is significantly easier than the previous posts. The Microsoft SPFX team did a great job architecting this framework.
yo @microsoft/sharepoint
Project Wizard Options
- Solution Name: sprest-fabric-react-spfx
- Baseline Package: SharePoint Online only
- Target Location: Use the current folder
- Tenant Admin: No
- Project Type: WebPart
- Project Name: SPREST Fabric React
- Project Description: Demo example for SPREST and Fabric React
- Framework: React
Project Dependencies
After the project is created, the next step is to add the office fabric react ui, gd-sprest core and gd-sprest react libraries.
npm i --save office-ui-fabric-react gd-sprest gd-sprest-react
Migrate the Code
The github project for this blog series has been updated to include examples of using various react components from the gd-sprest-react library. We will walk through migrating it to an SPFX project.
1. Copy Code
Copy the files in the “src” folder to the “src/old_src” folder of the webpart. You would essentially put it in the “components” folder, but I want to separate things to make it easier.
2. Reference the Library & Dashboard
In the webpart file, add the reference to the gd-sprest library and the Dashboard component.
// Import the gd-sprest library and dashboard
import { ContextInfo } from "gd-sprest";
import { Dashboard } from "./old_code";
3. Update the render() Method
The last step is to update the page context and then render method to render the Dashboard component. Setting the page context in the gd-sprest library is required for POST requests made to the REST API on modern pages. If the target is a classic page, then you won’t need to do this.
public render(): void {
  // Set the context
  ContextInfo.setPageContext(this.context.pageContext);

  // Create the dashboard element
  const element: React.ReactElement<null> = React.createElement(Dashboard);

  // Render the dashboard
  ReactDom.render(element, this.domElement);
}
4. That’s It
I was pretty surprised at how easy this was. For a real project, you will want to copy the src code to the components folder, and not “old_code”. I also recommend Voitanos from Andrew Connell for more advanced training with SPFX. He will give key help when it comes to bundling and how to reference the common libraries (React, Fabric-UI, etc) across multiple projects to help with performance. This will be essential for designing real-world solutions.
Test WebPart
The Microsoft team has made testing solutions much easier with the SPFX. Refer to the hello world webpart example for details steps of debugging and testing the solution in your local dev workbench, tenant workbench and tenant SharePoint page.
1. Test in Local Workbench
Run the following command to start a local server on localhost:4321. Your default browser will be opened after the server is ready, pointing you to the SharePoint workbench. This will allow you to preview you solution before testing it online.
gulp serve
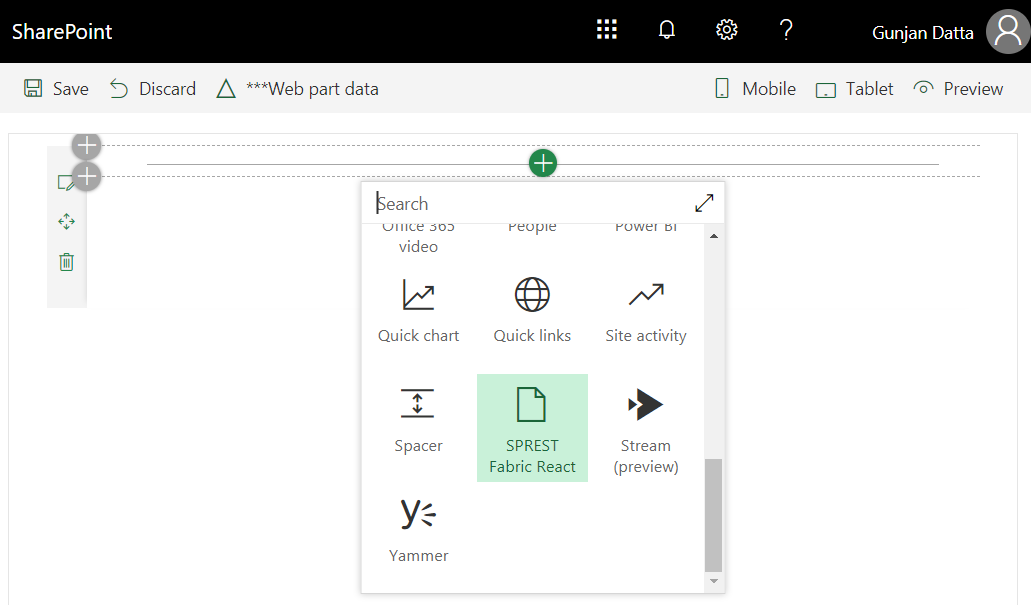
Add the WebPart

View the WebPart
 The local workbench will not be able to execute requests to the REST API. This test should be used for developing the look and feel of the solution.
2. Test in Tenant Workbench
Now that the solution works in the local workbench, we can now test the components in our tenant. Instead of deploying it to a site collection or the app catalog, the Microsoft SPFX team has made the workbench available in SharePoint Online.
gulp serve --nobrowser
Edge Issue
As of Spring 2018, Microsoft Edge doesn’t seem to connect to the dev environment. Please use IE or Chrome until this issue is fixed. 
Add the WebPart
View the WebPart
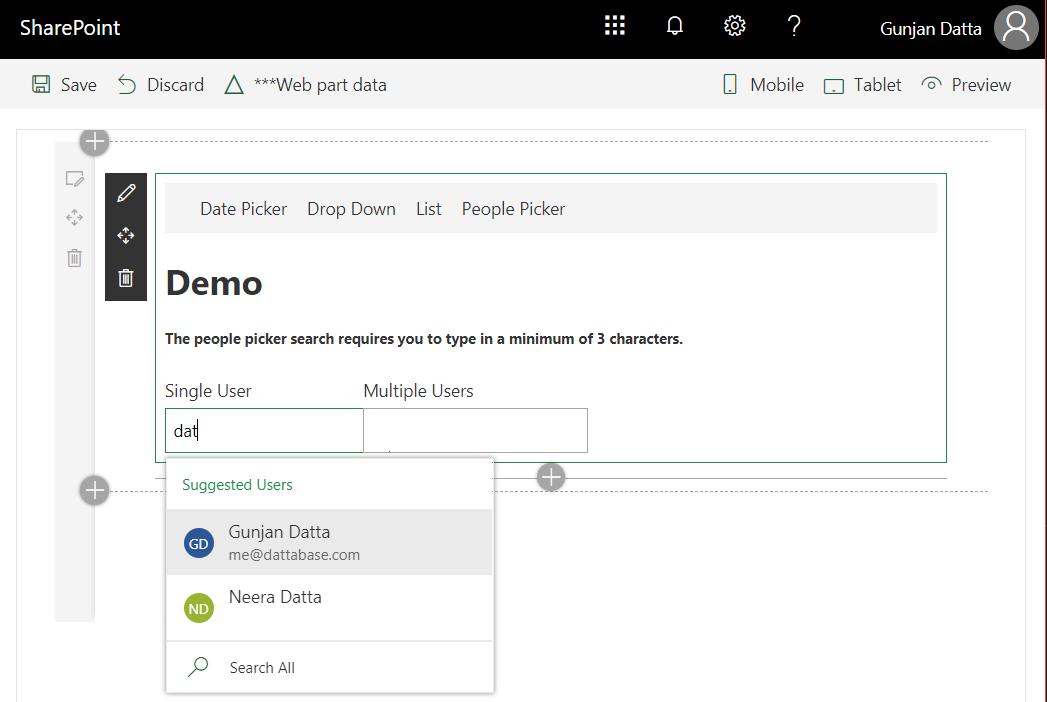
Test the WebPart
Since we are testing in the tenant workbench, we are able to test the requests made to the REST API.