Trigger a Flow from JavaScript
This post will give an overview of how to trigger a flow from JavaScript.
Note - This code example has been tested in various cloud environments. The user MUST be licensed which maybe an issue for external users. The correct Flow endpoint must be used for authentication, based on the cloud enviornment. An additional request to retrieve the flow authentication token maybe necessary for other cloud environments.
Update - This blog post has been updated to address possible errors due to the auth token. The code example at the end of the post has been updated to address this issue.
Flow & SharePoint Development
Splitting out the business logic and utilizing Flow to run dynamically or by code has always been on my TODO list. This approach will help customers/clients maintain solutions easily through Flow, instead of relying on a developer for code updates.
This code walkthrough will create a flow for a list to send a notification to the user in the item’s value. Next we will demonstrate how to trigger this flow against the item using JavaScript from SharePoint.
Create the Flow
The section will create a list and create/configure a flow.
Note - This approach will work against a list or library.
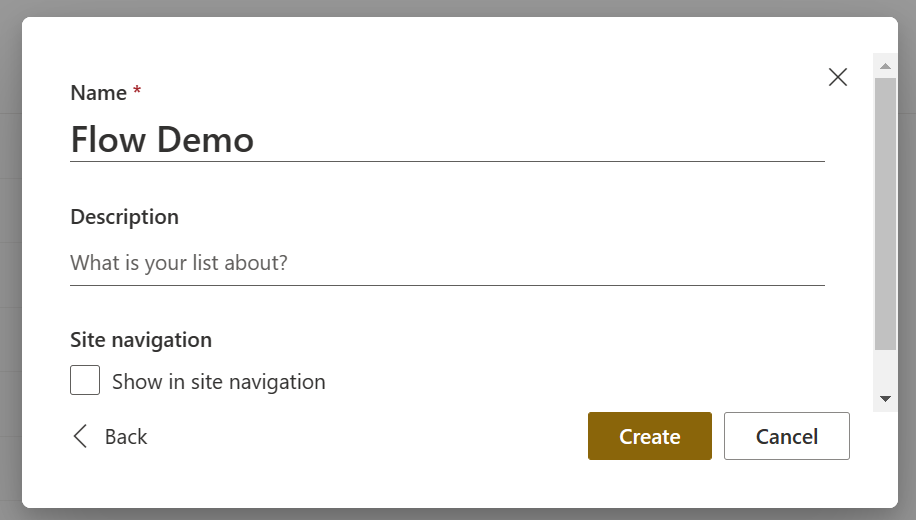
Step 1 - Create the List
Create a list to execute this flow against.
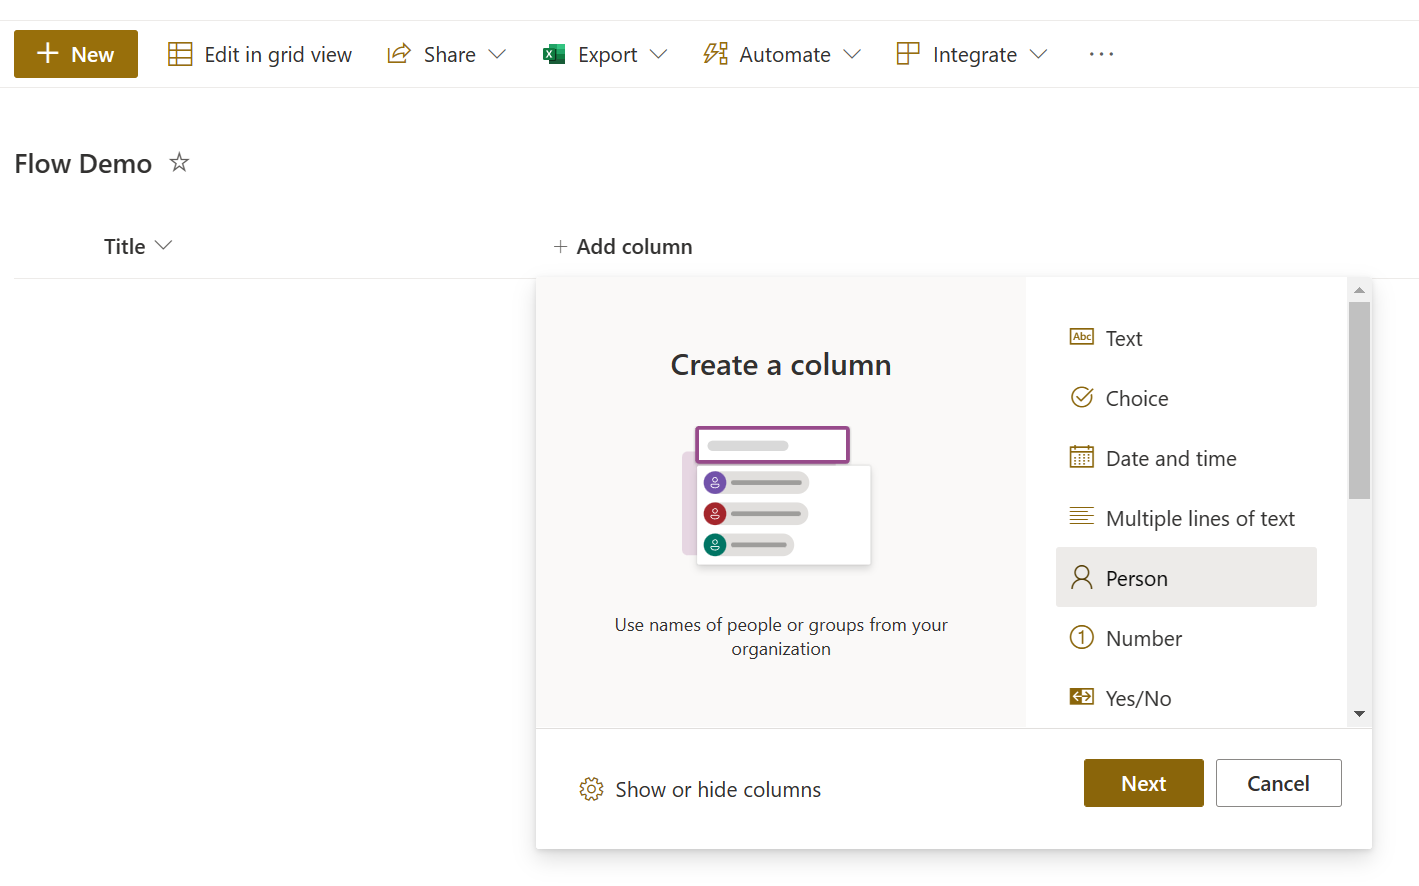
Next, add a user field that we will reference in the notification.
Step 2 - Create Flow
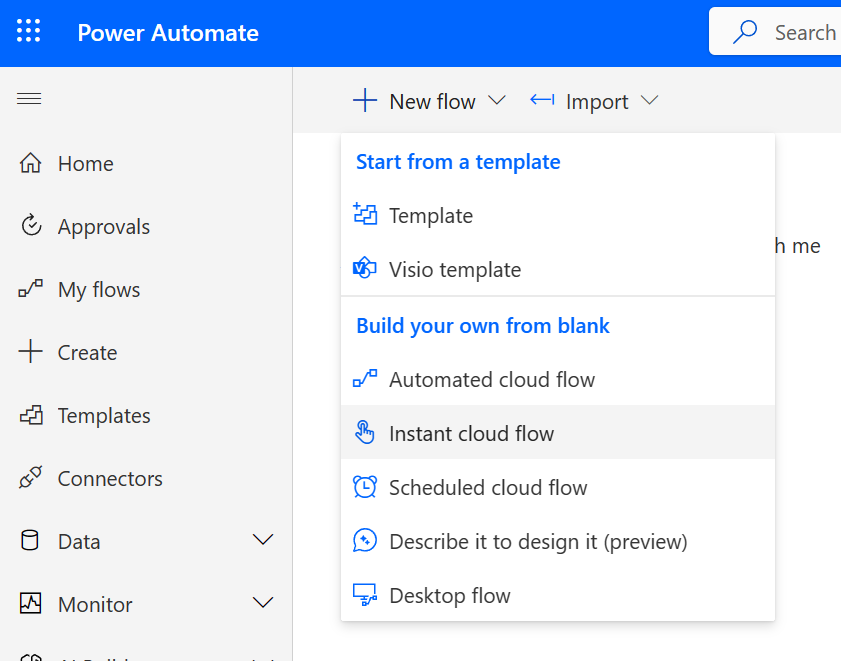
Access Power Automate and create a new “Instant Cloud” flow, and click on the “Skip” option in the next window.
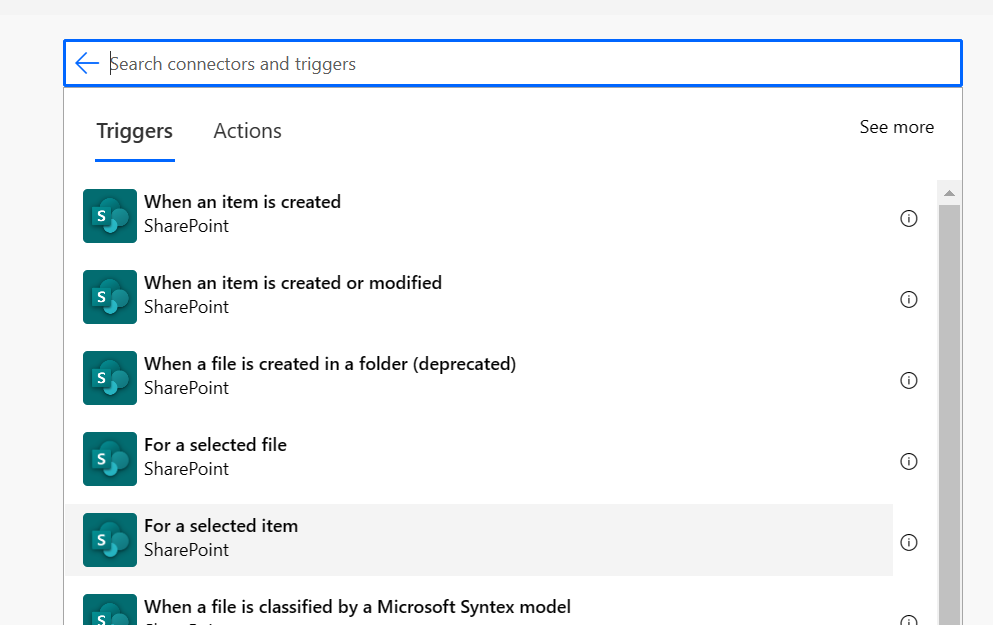
Name the flow and select the SharePoint trigger For a Selected Item.
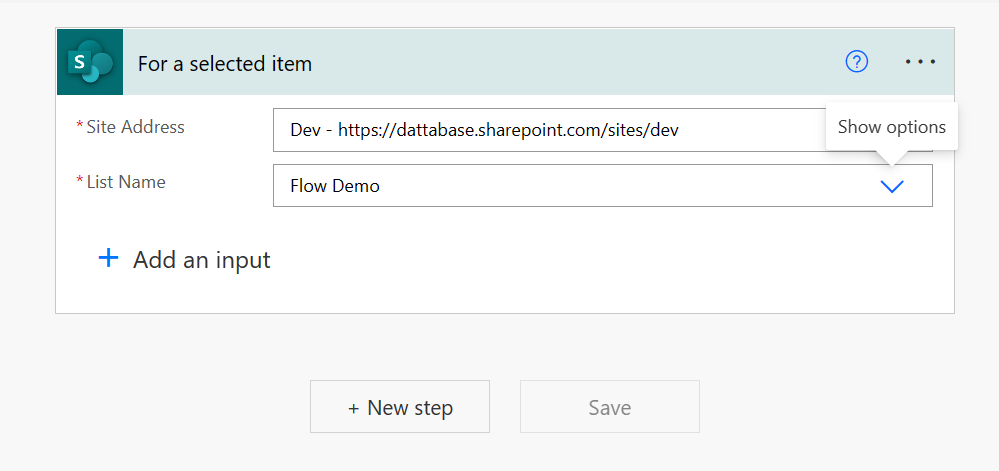
Step 3 - Implement the Flow
Type in the site address and select the list from the drop down.
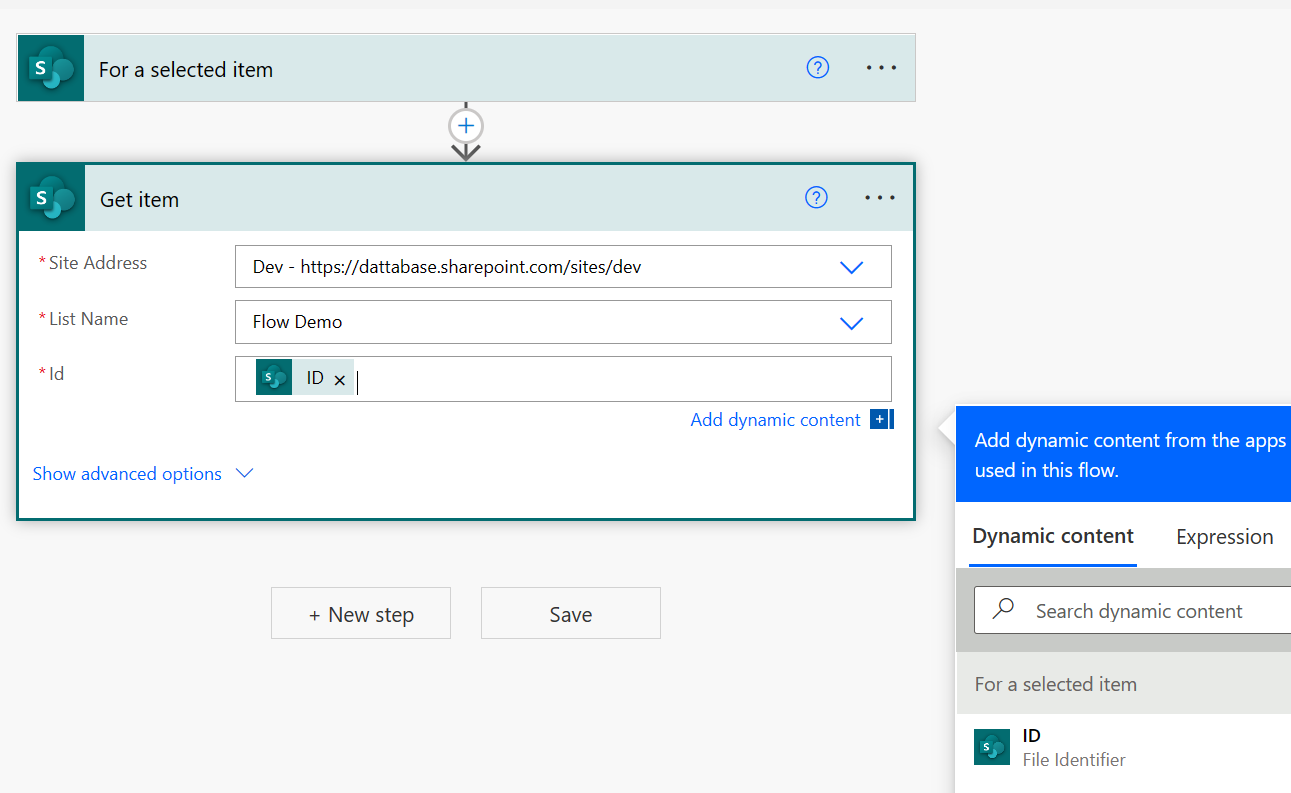
Since this flow is triggered manually, we will need to get the item properties.
The last step is to add the step for sending an email. This is just an example, so it will just send the Title information to the user selected.
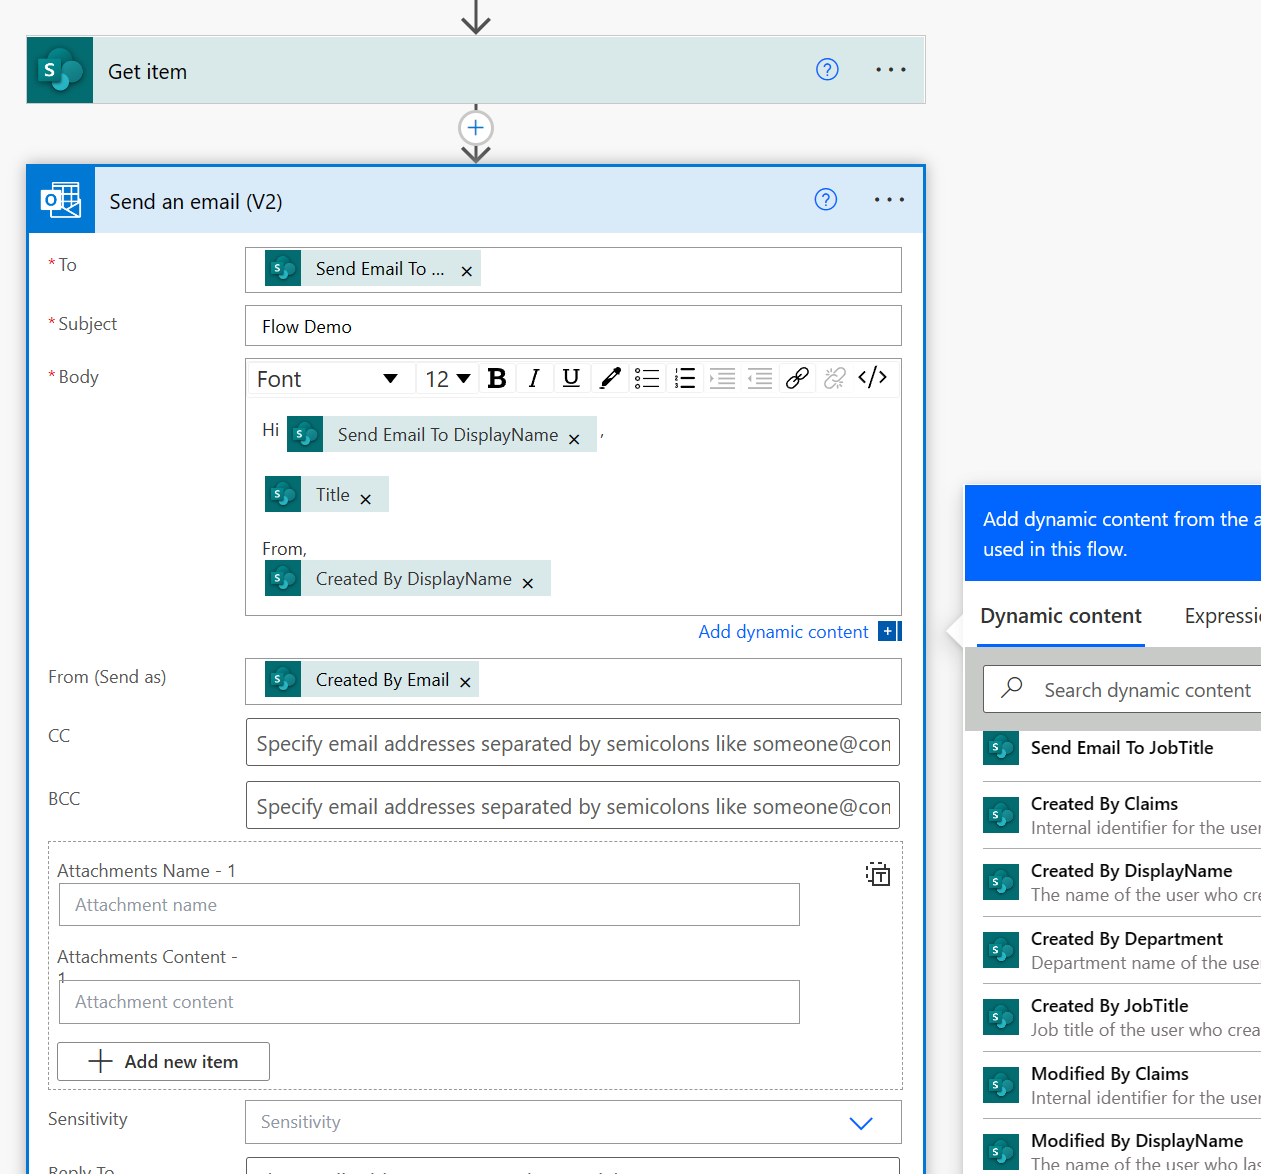
Note - Don’t forget to save your flow.
Create the JavaScript
This section will go over the code to execute the flow. I will trigger this from the browser console, but will provide the typescript code example at the end of this post.
Step 1 - Reference the gd-sprest Library
We will use the gd-sprest library to interact with the SharePoint REST API. A previous post goes over Graph API calls from SharePoint Online. We will utilize the getAccessToken method to authenticate with Flow.
From the browser console, reference the library.
var s = document.createElement("script"); s.src = "https://cdnjs.cloudflare.com/ajax/libs/gd-sprest/7.4.0/gd-sprest.min.js"; document.head.appendChild(s);

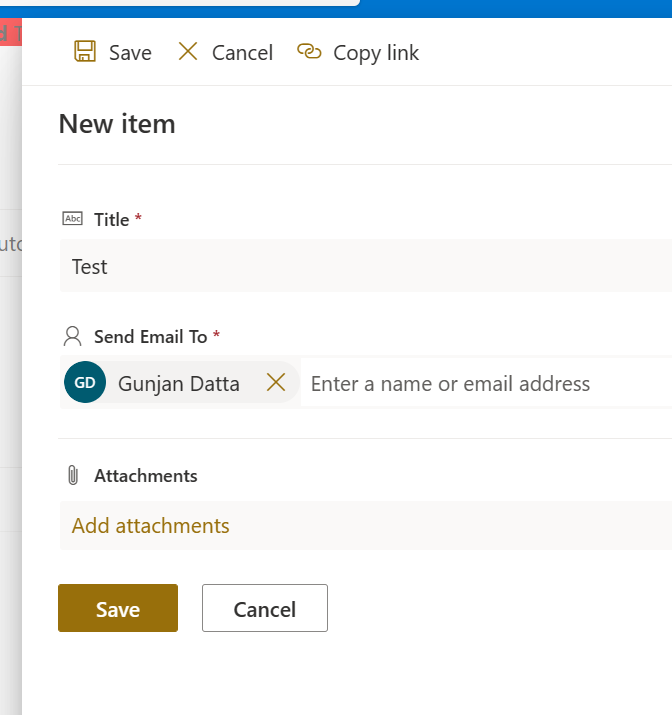
Create a test item for the flow and note the item id of it. We will send this item id in a later step.
Step 2 - Get the Flow Token
Next, we will need to authenticate with Power Automate in order to run the flow. We will utilize the getAccessToken method from the Graph component to authenticate with Flow. I recently updated the SPTypes enumerator with this new value.
Note - You must use the correct cloud environment, or you will get an authroization error when triggering the flow.
var auth = $REST.Graph.getAccessToken($REST.SPTypes.CloudEnvironment.Flow).executeAndWait();
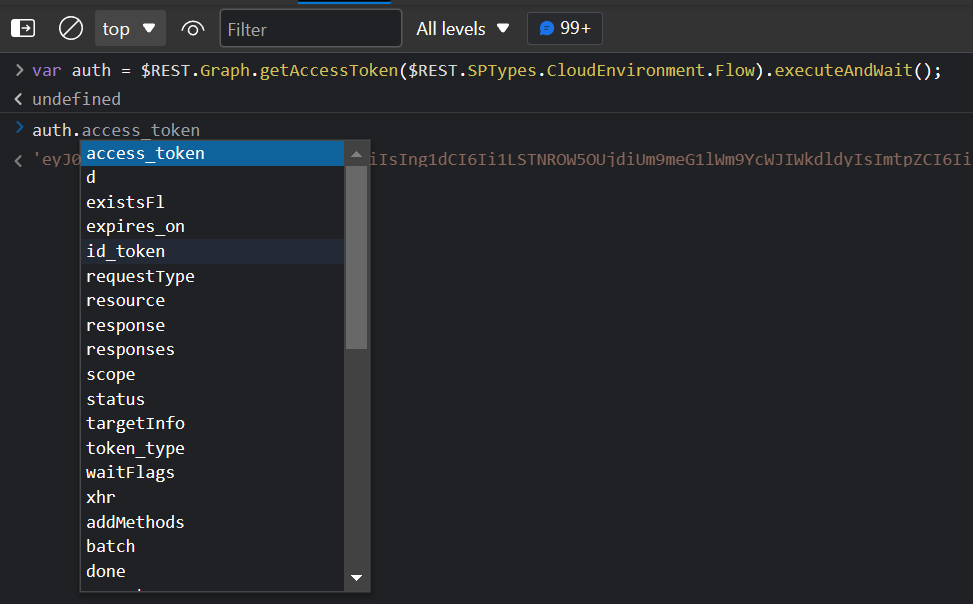
The auth variable will contain the access token we will need to trigger the flow.
Step 3 - Get the Flow Instance
Next, we will get the flow instance. This will ensure the user has access to it, and to get the information required to run the flow.
Note - The guid of the flow can be found in the URL of the Power Automate.
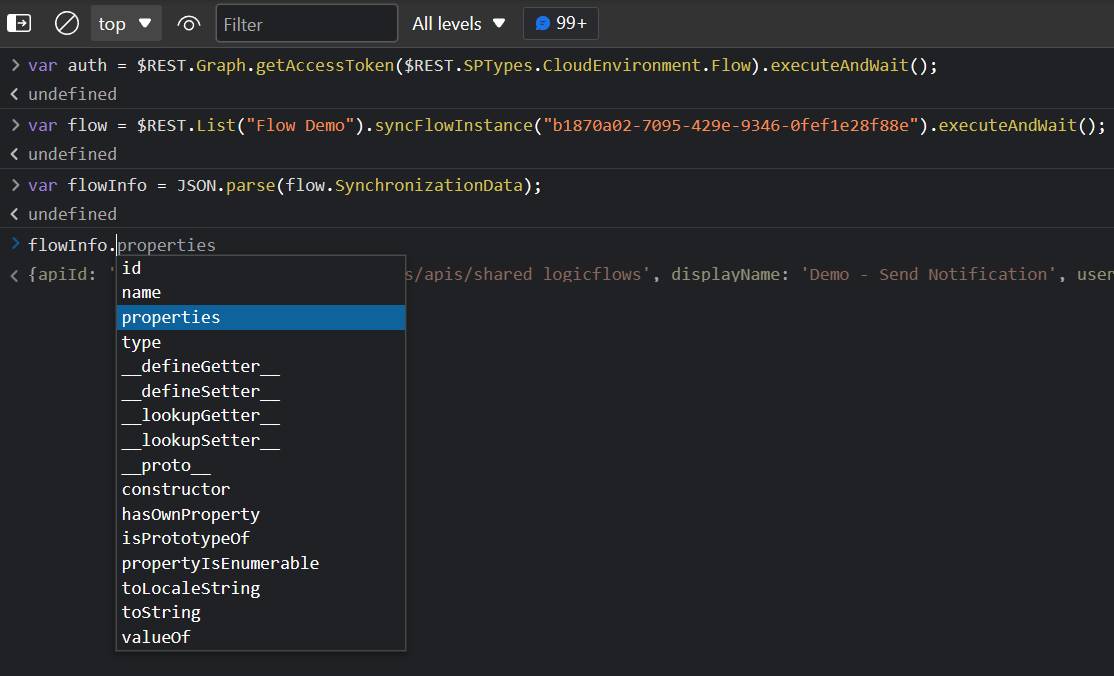
var flow = $REST.List("Flow Demo").syncFlowInstance("b1870a02-7095-429e-9346-0fef1e28f88e").executeAndWait();
The flow information is stored as a JSON string, so we will extract the information by parsing it.
var flowInfo = JSON.parse(flow.SynchronizationData);
Step 4 - Run the Flow
Now that we have the access token and flow information, we can now trigger it by making a POST call.
Create the Header
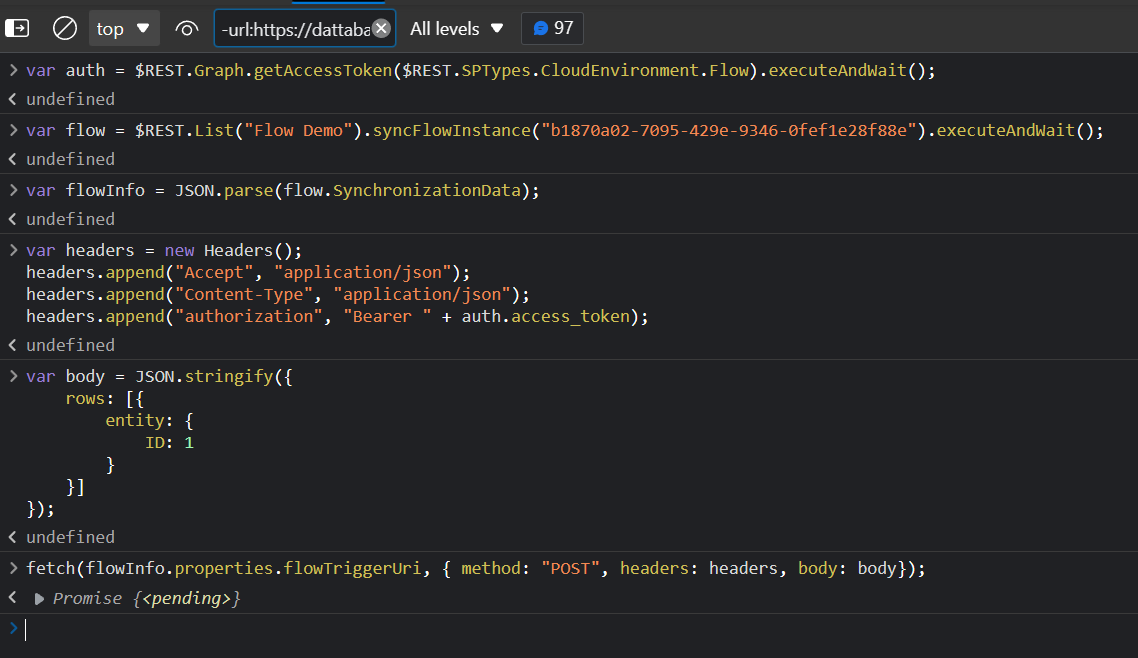
var headers = new Headers();
headers.append("Accept", "application/json");
headers.append("Content-Type", "application/json");
headers.append("authorization", "Bearer " + auth.access_token);
Note - We will reference the access token from Step 1.
Flow Parameters
The flow will require some parameters about the item id. For this example, it’s a new list so the first item I create will be 1.
var body = JSON.stringify({
    rows: [{
        entity: {
            ID: 1
        }
    }]
});
Trigger Flow
We will send a POST request to trigger the flow.
fetch(flowInfo.properties.flowTriggerUri, { method: "POST", headers: headers, body: body});
Possible Errors
I’ve seen issues in other cloud environments. The error displayed is shown below, related to the token.
Error from token exchange: Bad authorization token. The access token is from wrong audience or resource.
If you receive this error, then you will need to make another request to get the token for the user.
Get Token (onBehlafOfTokenBundle)
Digging through the network logs, I found this request being made that matched the correct token to use. This method is not needed for commercial, but was required for other cloud environment types.
I have updated the gd-sprest library to include new Cloud Environment enums, so you will need to get the latest past 7.4.0 for this to work.
For this example, we will target the GCC-High environment.
var flowAuthUrl = $REST.SPTypes.CloudEnvironment.FlowHighAPI + flowInfo.properties.environment.id + "/users/me/onBehalfOfTokenBundle?app-version=2016-11-01";
fetch(flowAuthUrl, { method: "POST", headers: headers }).then(r => r.json()).then(r => {
    // Get the token, and fallback on the default one if it doesn't exist
    // I'm adding the default one back for commercial if you wanted a single generic method
    var flowToken = r.audienceToToken["https://" + flowInfo.properties.connectionReferences.shared_sharepointonline.swagger.host] || auth.access_token;

    // Set the headers
    var headers = new Headers();
    headers.append("Accept", "application/json");
    headers.append("Content-Type", "application/json");
    headers.append("authorization", "Bearer " + flowToken);

    // Set the body
    var body = JSON.stringify({
        rows: [{
            entity: {
                ID: 1
            }
        }]
    });

    fetch(flowInfo.properties.flowTriggerUri, { method: "POST", headers: headers, body: body});
});
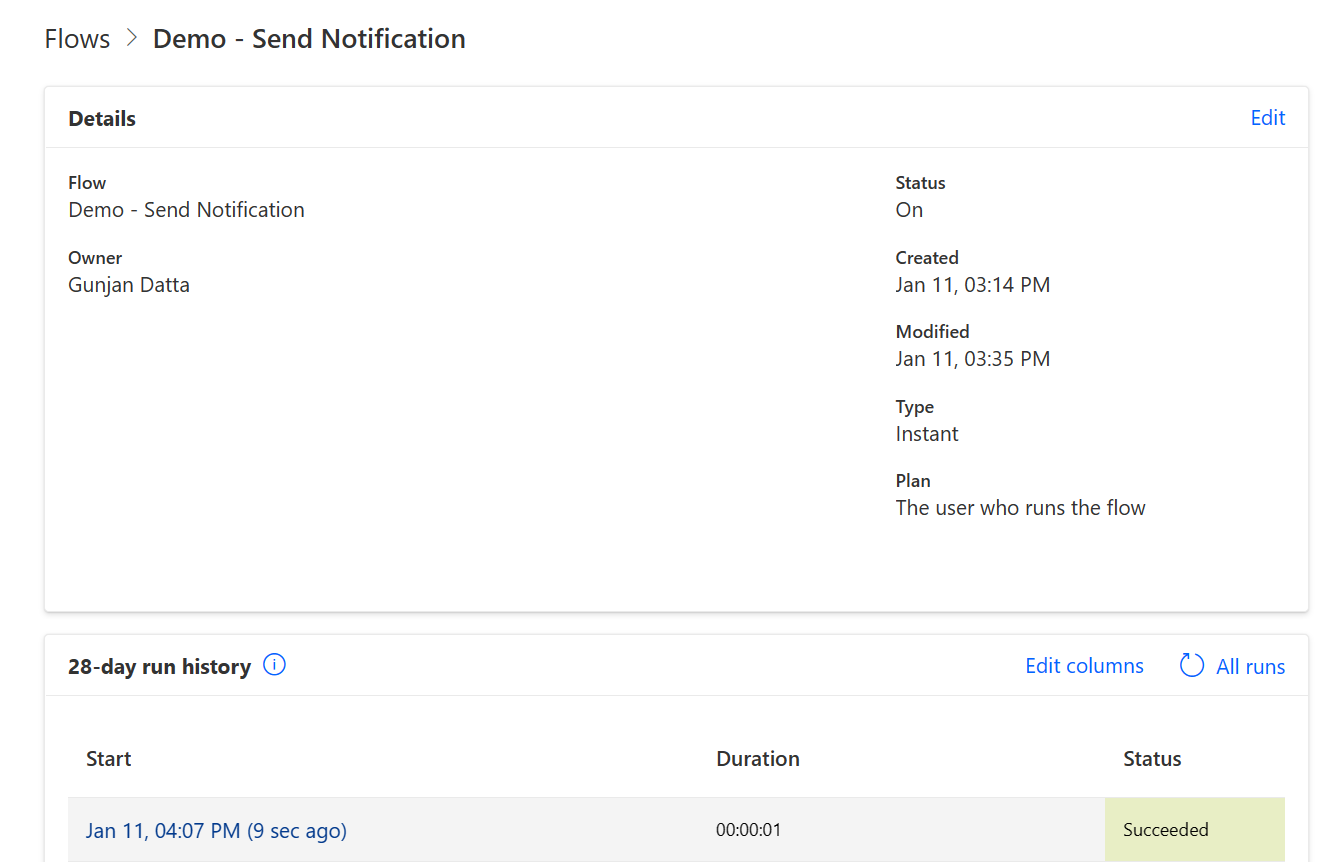
Step 5 - Validate the Run
Refresh the Flow’s page to view the last run times.
Code Example
This class will contain a static method for executing a flow. You will need to pass in the list name, item id and flow id. The web url parameter is optional.
import { Graph, SPTypes, Web } from "gd-sprest"; // Or gd-sprest-bs library

export class RunFlow() {
    // Executes a flow
    static execute(listName:string, itemId: number, flowId: string, webUrl?:string):PromiseLike<void> {
        // Return a promise
        return new Promise((resolve, reject) => {
            // Get the access token
            this.getAccessToken().then(access_token => {
                // Get the flow information
                this.getFlow(listName, flowId, webUrl).then(flowInfo => {
                    // Get the flow token
                    this.getFlowToken(access_token, flowInfo).then(flow_token => {
                        // Trigger the flow
                        this.triggerFlow(itemId, flow_token, flowInfo).then(resolve, reject);
                    });
                }, reject);
            }, reject);
        });
    }

    // Gets the access token
    private static getAccessToken(): PromiseLike<string> {
        // Return a promise
        return new Promise((resolve, reject) => {
            // Execute a request to flow
            Graph.getAccessToken(SPTypes.CloudEnvironment.Flow).execute(auth => {
                // Resolve the request
                resolve(auth.access_token);
            }, reject);
        });
    }

    // Gets the flow token
    private static getFlowToken(access_token: string, flowInfo: any):PromiseLike<string> {
        // Return a promise
        return new Promise((resolve, reject) => {
            // Create the xml http request
            let xhr = new XMLHttpRequest();
            xhr.open("POST", SPTypes.CloudEnvironment.FlowAPI + flowInfo.properties.environment.id + "/users/me/onBehalfOfTokenBundle?api-version=2016-11-01", true);

            // Set the headers
            xhr.setRequestHeader("Accept", "application/json");
            xhr.setRequestHeader("Content-Type", "application/json");
            xhr.setRequestHeader("authorization", "Bearer " + access_token);

            // Set the state change event
            xhr.onreadystatechange = () => {
                // See if the request has finished
                if (xhr.readyState == 4) {
                    // Ensure it was valid
                    if(xhr.status >=200 && xhr.status < 300) {
                        // Get the token information
                        let tokenInfo = JSON.parse(xhr.response);

                        // Resolve the request
                        resolve(tokenInfo.audienceToToken["https://" + flowInfo.properties.connectionReferences.shared_sharepointonline.swagger.host] || access_token);
                    } else {
                        // Reject the request
                        reject();
                    }
                }
            }

            // Execute the request
            xhr.send();
        });
    }

    // Gets the flow
    private static getFlow(listName: string, flowId: string, webUrl?: string):PromiseLike<any> {
        // Return a promise
        return new Promise((resolve, reject) => {
            // Get the flow for the list
            Web(webUrl).Lists(listName).syncFlowInstance(flowId).execute(flowInfo => {
                // Resolve the request
                resolve(JSON.parse(flowInfo.SynchronizationData));
            }, reject);
        });
    }

    // Trigger the flow
    private static triggerFlow(itemId: number, flow_token: string, flowInfo: any) {
        // Create the xml http request
        let xhr = new XMLHttpRequest();
        xhr.open("POST", flowInfo.properties.flowTriggerUri, true);

        // Set the headers
        xhr.setRequestHeader("Accept", "application/json");
        xhr.setRequestHeader("Content-Type", "application/json");
        xhr.setRequestHeader("authorization", "Bearer " + flow_token);

        // Set the body
        let body = JSON.stringify({
            rows: [{
                entity: {
                    ID: itemId
                }
            }]
        });

        // Set the state change event
        xhr.onreadystatechange = () => {
            // See if the request has finished
            if (xhr.readyState == 4) {
                // Ensure it was valid
                if(xhr.status >=200 && xhr.status < 300) {
                    // Resolve the request
                    resolve();
                } else {
                    // Reject the request
                    reject();
                }
            }
        }

        // Execute the request
        xhr.send(body);
    }
}
Summary
I hope you find this code example helpful. Happy Coding!!!