SharePoint App - Fabric UI and React (Part 1 of 3)
In this post I will give a step-by-step guide of building a SharePoint Hosted Add-In utilizing the Office Fabric UI React framework. I will break this out into three sections: 1. Configuring the User Interface Project (This Post) 2. Configuring the SharePoint Hosted Add-In Project 3. Convert to the SharePoint Framework
Updated Jan 2018
I’ve updated this post to use the latest versions of the libraries from Jan 2018.
Updated For WebPack 2.0
I’ve updated this post to fix the issues with webpack. A sample project using this approach can be found here.
Software Requirements
- Visual Studio Code Not required, but recommended to use for developing NodeJS projects.
- Visual Studio Community Required to create the SharePoint Add-In.
- Office Developer Tools for Visual Studio This plugin is for Visual Studio. It will add the Office and SharePoint project templates. We will need it to create the SharePoint Add-In project.
- Node JS Required to create NodeJS projects.
- Node JS Tools for Visual Studio This plugin is for Visual Studio. It will add the NodeJS project templates. We will need it to create the NodeJS project in Visual Studio.
- NPM Task Runner for Visual Studio This plugin is for Visual Studio. It will allow you to execute the “npm run [config]” commands from Visual Studio.
Background Information
For the SharePoint developers who are currently working in SP 2013 on-premise environments, I wanted to give a recommendation for how to structure the solution. This recommendation will separate the user interface from the actual app, so we can easily upgrade the project to the SharePoint Framework (SPFX) once the client is ready.
Create the VS Solution
The Visual Studio solution will consist of two projects: 1. SharePoint Add-In 2. Node.js Web Application
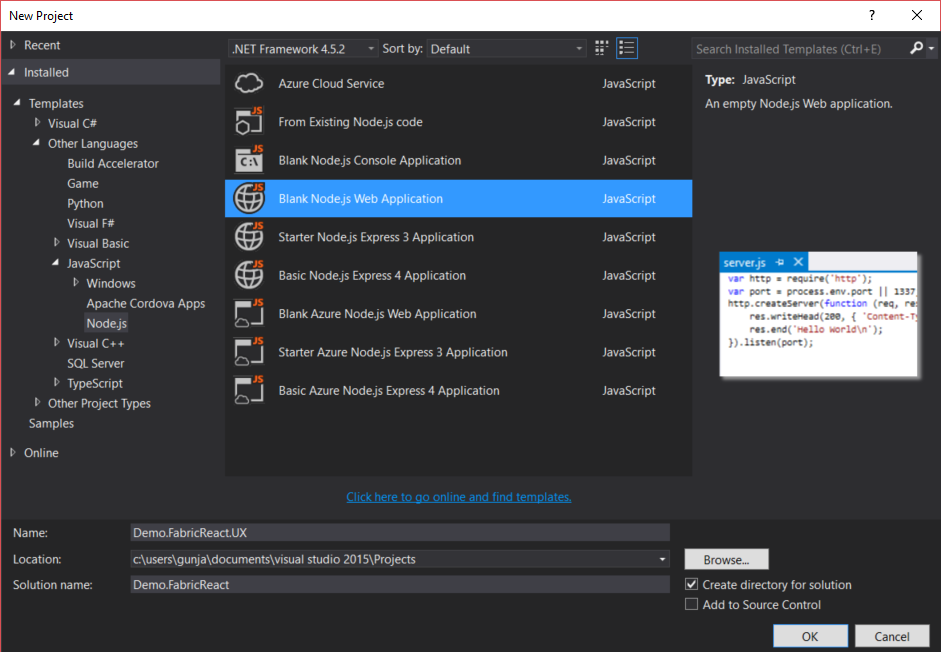
First we will create the Visual Studio solution. Make sure to do the following:
- Select “Blank Node.js Web Application”
- Check the option to create a directory for a solution
- Set the “Project Name” to [Solution Name].UX
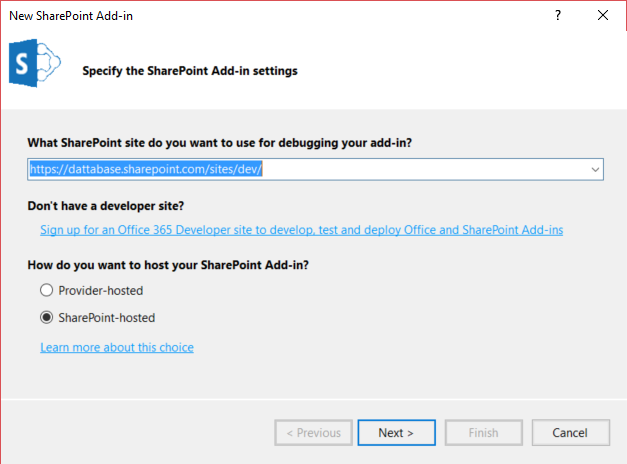
Next we will create the SharePoint Hosted Add-In. Make sure to do the following:
-
Set the “Project Name” to [Solution Name].App
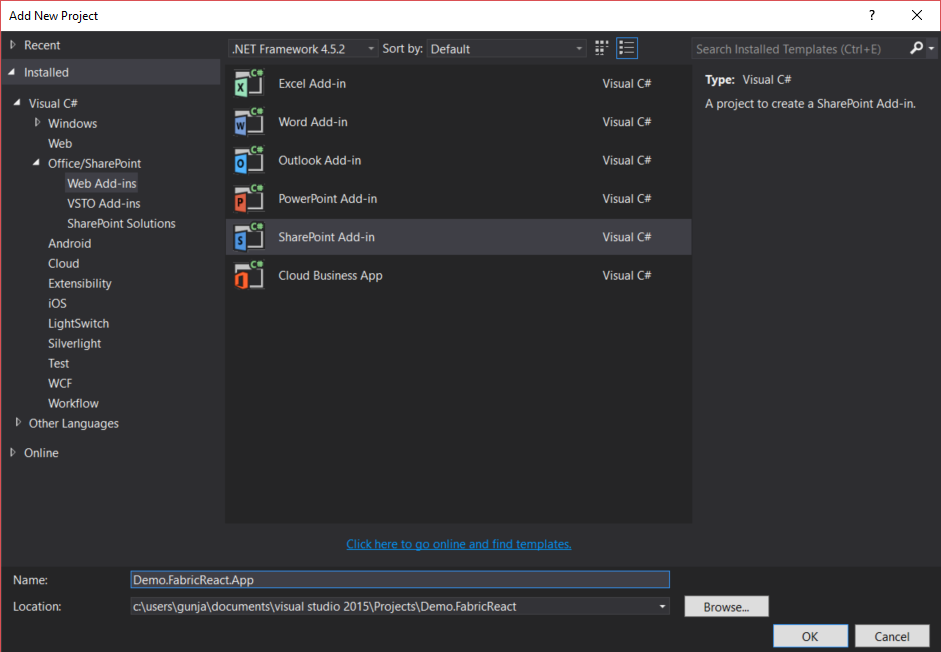
-
Select the “SharePoint-hosted” for the “Add-In” type
Configure the User Interface
This section will configure the [Solution Name].UX Node.js Web Application project.
Project Folder Structure
First, delete the default app.js file. The folder structure for the project will be the following:
- dist - This will contain the bundled script, which is the output of webpack.
- node_modules - These are the libraries associated with the project.
- src - The source code.
Install TypeScript Library
This is a global library which only needs to be done once in your development environment.
npm i -g typescript
Install the dependencies
Open up powershell and goto the root folder of the visual studio project. We will be using the npm command to download the project dependencies. This demo will be utilizing the Office UI Fabric React framework, which requires the following libraries:
- Office UI Fabric React
- React
- React DOM
To download these libraries, type the following command into powershell:
npm i --save office-ui-fabric-react react react-dom
Note - The –save property will update the package.json configuration file.
Install the development dependencies
This section will go over the development tools to execute the following:
- Compile the React code
- Test the Solution
- Package the Solution
Compile and Package Solution
We will be using Babel to compile the React code and Webpack to bundle it together. Similar to the previous section, we will use npm to download the development libraries to do the following:
- @types/react - Required to compile the react code using the typescript compiler.
- @types/react-dom - Required to compile the react code using the typescript compiler.
- babel-core - Required to use “Babel”
- babel-loader - Compiles the JSX code to JavaScript.
- babel-preset-es2015 - Converts the JavaScript to ES2015 (The current web standard supported by browsers)
- react-hot-loader - Plugin for the webpack development server library to display code changes on-demand
- ts-loader - Compiles the TypeScript code to JSX.
- webpack - Used to compile, bundle and package the solution
To download these libraries, type the following command into powershell:
npm i --save-dev @types/react @types/react-dom babel-core babel-loader babel-preset-es2015 react-hot-loader ts-loader webpack
Note - The –save-dev property will update the package.json configuration file.
Testing the Solution
Webpack has a plugin available for its development server to automatically recompile code changes without having the need to stop and start the dev server. My recommendation is to install this globally, since you will probably use this in multiple projects and only want to install one instance. To download this library, type the following command into powershell:
npm i -g webpack webpack-dev-server
Note - The -g property will install the library globally
Configuration Files
This section will configure the files shown below. These files should be placed in the root of the project folder. The package.json file is created with the project, but the tsconfig.json and webpack.config.js files will need to be created manually.
- package.json - npm project configuration file
- tsconfig.json - typescript configuration file
- webpack.configuration.js - webpack configuration file
package.json
Below is the package configuration file. The “dependencies” and “devDependencies” properties are updated by running the npm install commands in the previous sections. The part to add is the “scripts” property to build and test the solution. Reference the “webpack.config.js” section for additional information.
{
  "name": "sprest.fabric-react.ux",
  "version": "0.0.1",
  "description": "Demo project utilizing the office fabric react framework.",
  "main": "./src/index.tsx",
  "author": {
    "name": "Gunjan Datta"
  },
  "scripts": {
    "build": "webpack",
    "test": "webpack-dev-server --hot --inline --colors --progress"
  },
  "dependencies": {
    "gd-sprest": "^3.8.8",
    "gd-sprest-react": "^2.9.2",
    "office-ui-fabric-react": "^5.86.0",
    "react": "^16.3.2",
    "react-dom": "^16.3.2"
  },
  "devDependencies": {
    "@types/react": "^16.3.12",
    "@types/react-dom": "^16.0.5",
    "babel-core": "^6.26.0",
    "babel-loader": "^7.1.4",
    "babel-preset-es2015": "^6.24.1",
    "css-loader": "^0.28.11",
    "es6-promise": "^4.2.4",
    "node-sass": "^4.8.3",
    "react-hot-loader": "^4.1.1",
    "sass-loader": "^7.0.1",
    "style-loader": "^0.21.0",
    "ts-loader": "^3.5.0",
    "webpack": "^3.10.0"
  }
}
Note - The –hot property of the test script is in reference to the react-hot-loader library
tsconfig.json
Below is the typescript configuration file. These options will do the following:
- Compile the react code
- Target ES5 code standards
{
    "compilerOptions": {
        "jsx": "react",
        "target": "es5"
    }
}
webpack.config.js
This configuration file is used to compile, bundle and package the solution files. The important things to highlight in this file are:
- context - The root folder of the solution source code.
- entry - The entry point(s) of the solution.
- output - The location of the output file(s).
- loaders - The configuration to pass to the compiler.
var path = require('path');

module.exports = {
    // Target the output of the typescript compiler
    context: path.join(__dirname, "src"),

    // File(s) to target in the 'build' directory
    entry: './index.tsx',

    // Output
    output: {
        filename: 'bundle.js',
        path: path.resolve(__dirname, 'dist'),
        publicPath: "/dist/"
    },

    // Resolve the file extensions
    resolve: {
        extensions: [".js", ".jsx", ".ts", ".tsx"]
    },

    // Module to define what libraries with the compiler
    module: {
        // Loaders
        loaders: [
            {
                // Target the sass files
                test: /\.scss?$/,
                // Define the compiler to use
                use: [
                    // Create style nodes from the CommonJS code
                    { loader: "style-loader" },
                    // Translate css to CommonJS
                    { loader: "css-loader" },
                    // Compile sass to css
                    { loader: "sass-loader" }
                ]
            },
            {
                // Target the .ts and .tsx files
                test: /\.tsx$/,
                // Exclude the node modules folder
                exclude: /node_modules/,
                // Define the compiler to use
                use: [
                    {
                        // Compile the JSX code to javascript
                        loader: "babel-loader",
                        // Options
                        options: {
                            // Ensure the javascript works in legacy browsers
                            presets: ["es2015"]
                        }
                    },
                    {
                        // Compile the typescript code to JSX
                        loader: "ts-loader"
                    }
                ]
            }
        ]
    }
};
Note - The loader information references the various dev libraries we added
Source Code
Now that we have the project configured, let’s create a sample page and test it.
index.html
Folder: /
First we will create default page for the dev server.
<html>
    <head>
        <title>Fabric React Demo</title>
    </head>
    <body>
        <!-- Element to render the solution to -->
        <div id="main"></div>

        <!-- The bundle output file. -->
        <script type="text/javascript" src="./dist/bundle.js"></script>
    </body>
</html>
index.tsx
Folder: /src
Next, we will add some sample code to test that we can render the office fabric components.
// These are the references to the react library
import * as React from "react";
import * as ReactDOM from "react-dom";

// This is how you import the components you need from the Office Fabric React Framework
import { Label } from "office-ui-fabric-react";

/**
 * Properties for the 'Demo' class
 */
interface Props {
    Demo Class: string;
}

/**
 * Demo Component
 */
export class Demo extends React.Component<Props, null> {
    // Method to render the component
        render() {
            return (
                <div>
                    <Label>Office Fabric React Demo</Label>
                    <Label disabled>{this.props.customMessage}</Label>
                </div>
            );
    }
}

// Get the "main" element
let target = document.querySelector("#main");
if(target) {
    // Render the component to it
    render(<Demo customMessage="This was generated using the Office Fabric React framework." /> />, target);
}
Test
This section will go over testing the solution, using the webpack dev server library.
VS Code - Task Runner Configuration
The assumption for this solution is for the UX developers to use Visual Studio Code to build out the solution. Using this solution will require you to configure the Task Runner. Type Ctrl+Shift+P to display the “Command Palette”. Once open, type in “task” and you will see the options to run the “Build” and “Test” tasks.
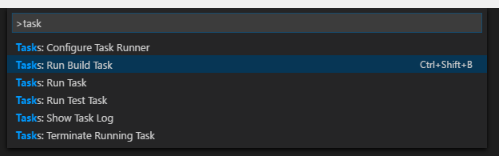 Note - To terminate a running task, type Ctrl+Shift+P and select the option to terminate the running task
VS Community - Run Build Task
To run the “Build” task in Visual Studio, right-click the “package.json” configuration file and select the “Task Runner Explorer”. 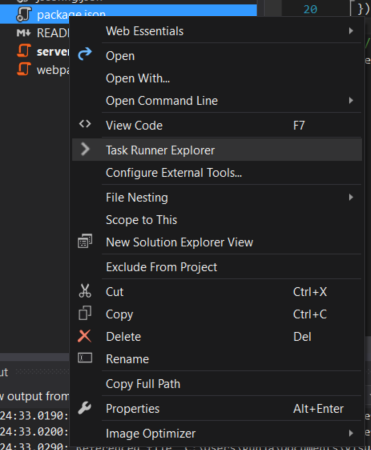
From the available options, double-click the “build” task to build the project. 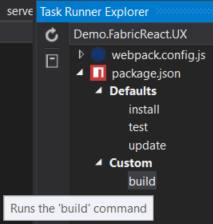
View the output and ensure it was successful. 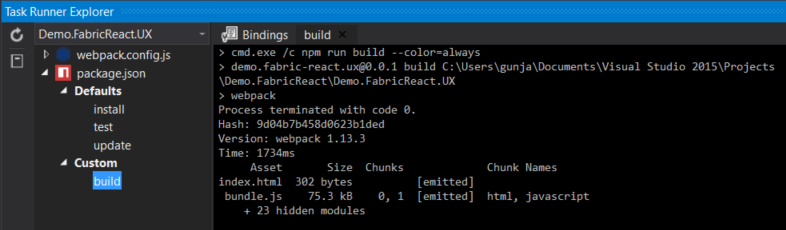
After successfully building the project, select the option to view all files in the Solution Explorer, and include the “dist” folder. 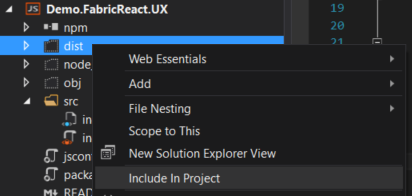
Note - View the bundle.js file in the dist folder. It will include all of the required js and css for the solution
VS Community - Run Test Task
To run the “Test” task, double-click the “test” task to build the project. 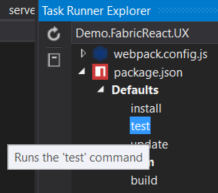
View the output and ensure it was successful. 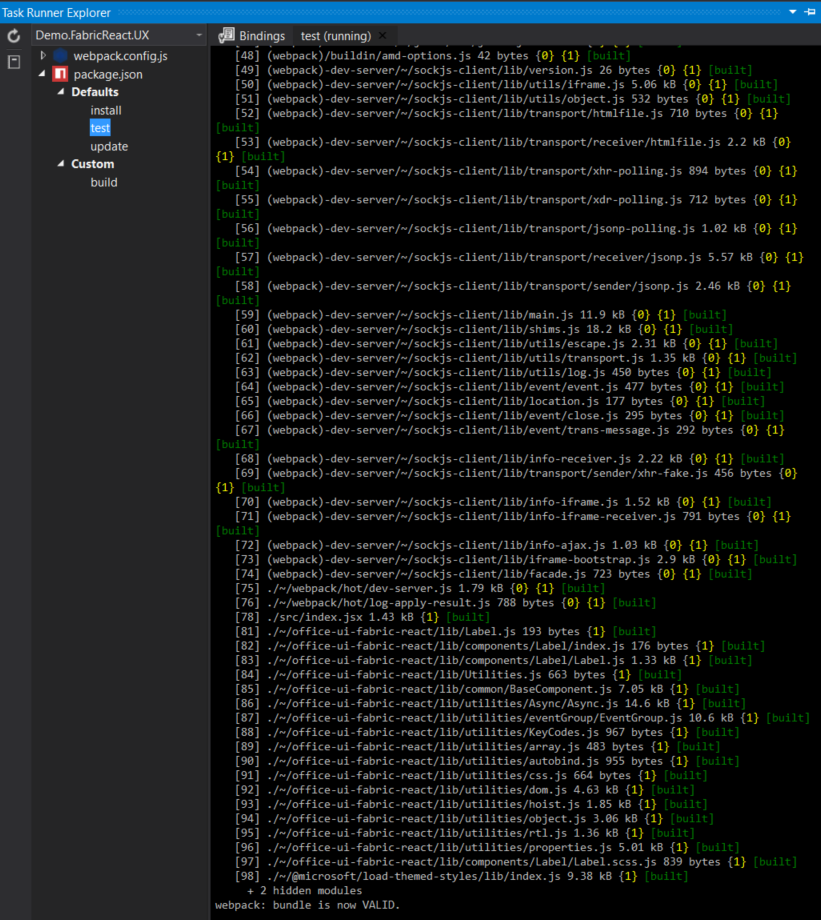
After successfully building the project, open up your internet browser of choice and goto “http://localhost:8080” to view the solution. 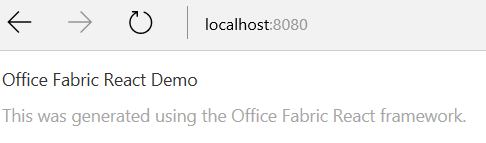
Note - To terminate the running task, close the “Test” window in the “Task Runner Explorer” window Note - Update the index.tsx file, change the message and save the file. View the browser to see the changes updated automatically
Conclusion
I hope you found this post useful. The next post will cover integrating this solution in a SharePoint Hosted Add-In.